|
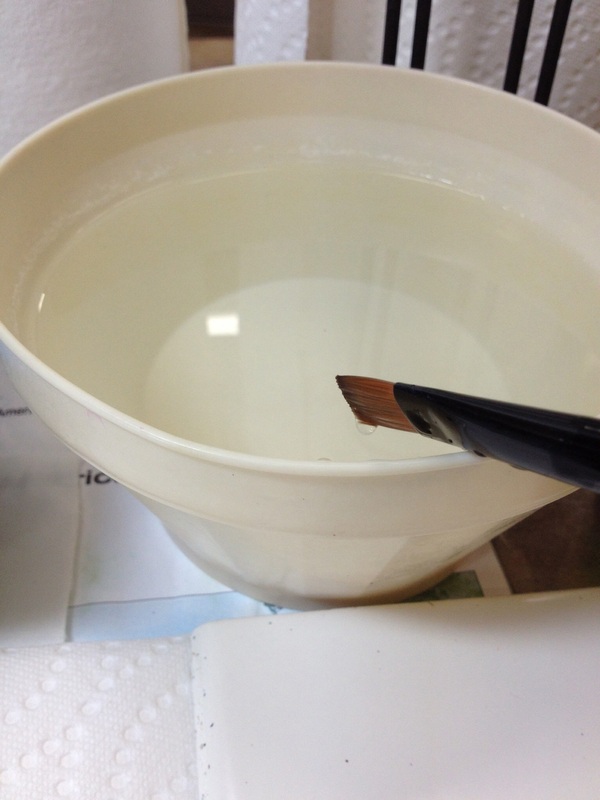
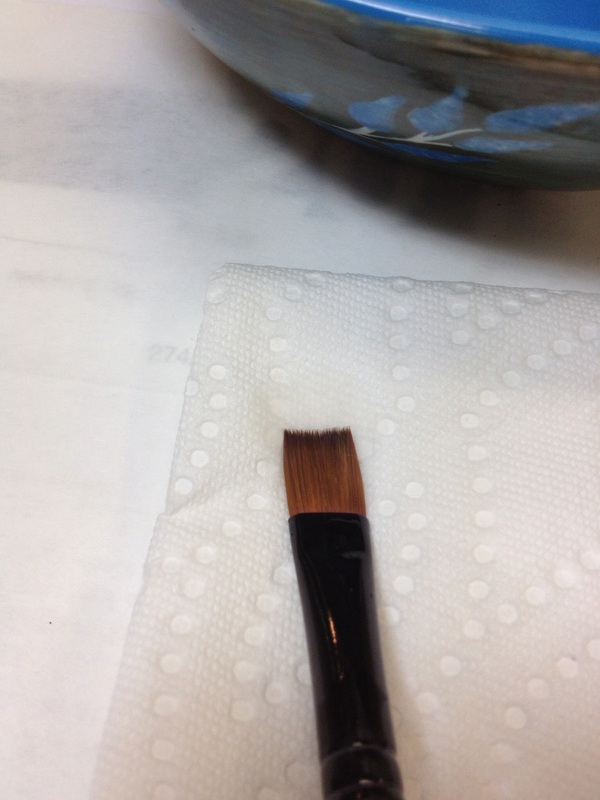
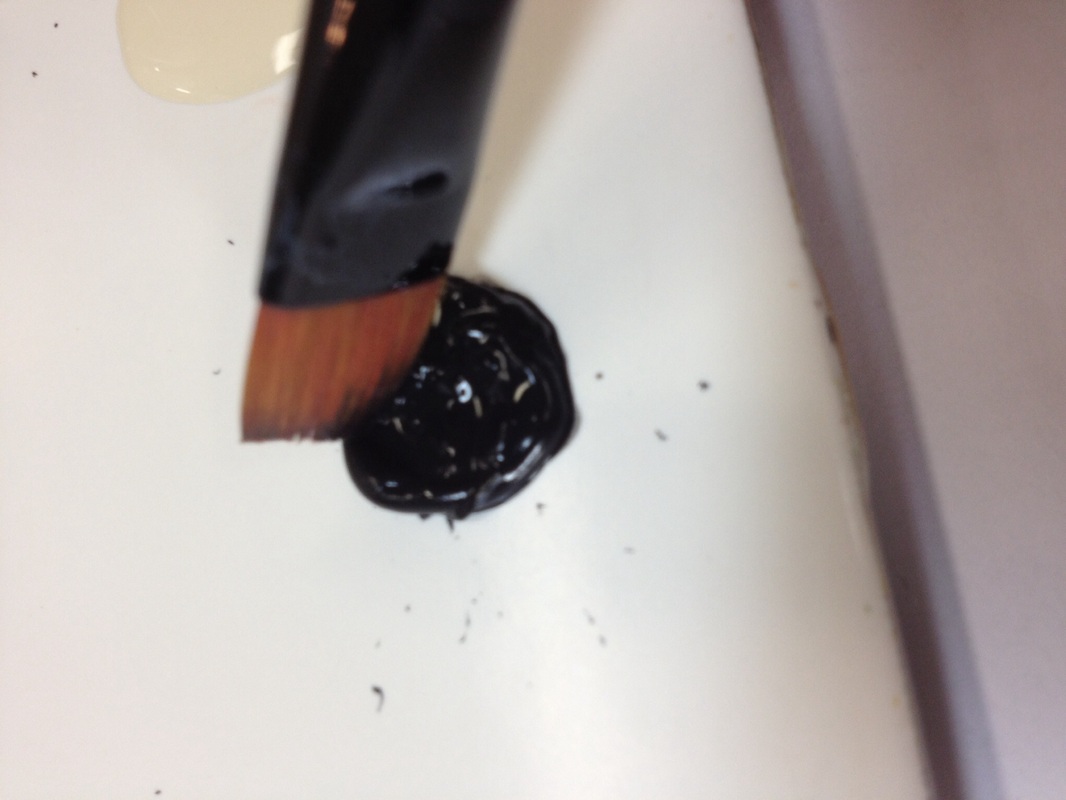
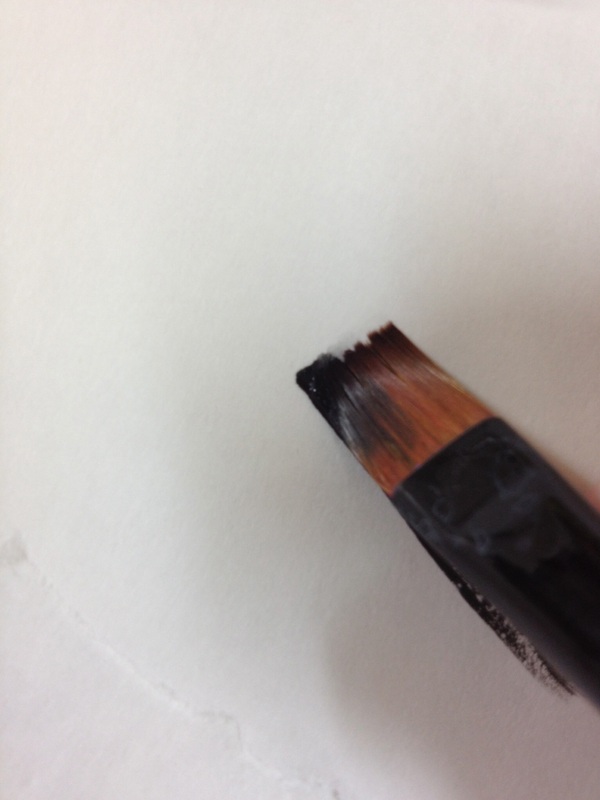
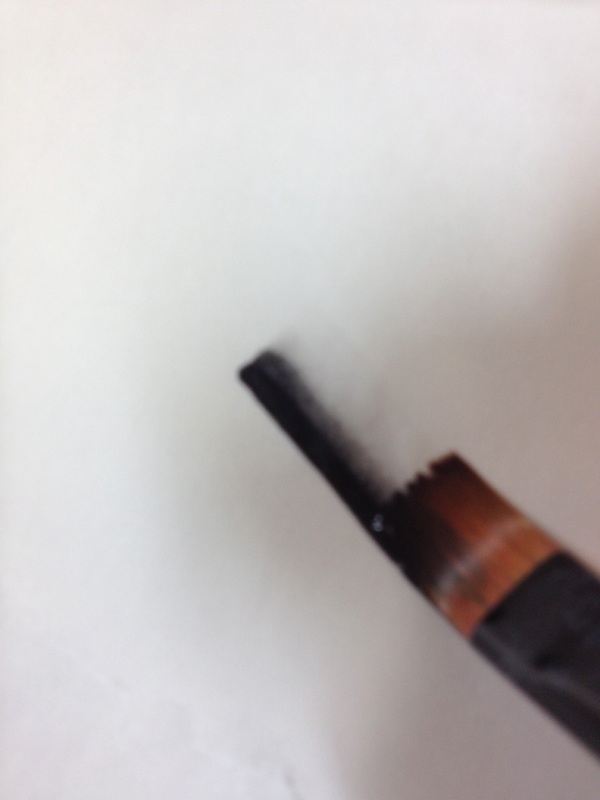
Tips & How to's for Corner Loading (CL): using a Flat square shader, dip your brush in water, tap on the side of the bowl to get drips off handle and bristles, then lay brush flat and press very quickly on paper towel, turn the brush over and press the other side quickly again, this just bleeds out excess moisture but not too much we need water in this brush. Using the same corner each time you load with paint will help you avoid having left over color in the side you thought was clean. My method for this is to load With the letter side (brush company writing on the handle) facing up. Dip just the corner of your brush in fresh paint (I prefer Doc Holliday Acrylics, use a darker color than the area you are shading) then holding your brush at a slight angle touch the full brush down on scratch paper (both corners and all surface of brush) using pressure to flatten and bend the bristles, and stroke against the paper to get the water in one corner blending with the paint in the other corner until the mark left on your paper is a smooth blend going from a crisp clean solid edge of paint on one side fading to nothing, leaving no hard line on the other side. If you press on the paper and water pools, you have too much water or you're pressing too hard. If your stroke is scratchy and sparse, you don't have enough water. Keep trying until your stroke is correct. Once you have it down on paper go to your piece. When painting reload often and work quickly to smooth out any imperfections before the paint dries. You don't want hard start and stop marks on your piece. Use this technique to shade crevice detail, define and outline border areas. The pictures show the steps |
Shelley Long
Ceramic Artist & Teacher 
I will share various tips for painting on this page, I hope you enjoy
them! Please feel free to ask questions or comment, it's always nice to
hear from other painters and I am happy to help any way I can! I will be adding various technique packages to the online store and when I
do I will post an update here to let you know a technique has been
added. Check back soon tips !
God Bless & Happy Painting! Shelley  
Receive Updates
program for scheduling - by BookFresh Categories
All
Archives
March 2016


Back to
|